Sunday 1 July 2012

Onya Baby: baby carrier product review (and holiday in northern Sweden)

I've just splurged on an Onya Baby carrier, and having used it quite a lot on holiday last week, I thought I'd share my reflections with you.


Note: this is not an endorsement of using the carrier as we do. Follow all manufacturer's instructions and make your own judgement on how to keep your baby safe if undertaking any activities like these!

Why an Onya Baby?

My son (T) is now 15 months old, and he's outgrown the Baby Björn we used with him when he was younger. We also have a Babylonia Tricot Slen, which is a knitted baby wrap or shawl (a wraparound sling), a long piece of fabric with a slight stretch, that you wrap around yourself and use to carry the baby. I loved the shawl when he was smaller, and still use it occasionally if he's fretting and I want to hold him close for a while to soothe him. But I just can't figure out how to hoist him onto my back and then spread out the fabric over him for a safe back carry. We also have a Macpac Vamoose Child Carrier for serious walking, but I wanted something to put him in when he wants to be close and I want to get the housework done. So interneting I went...

There are lots of soft structured baby carriers out there. I didn't want the hassle of a wrap or shawl, and the mei tais and similar combination wraps that I saw looked like the straps could get very uncomfortable quite quickly. I'm sure they are fine if you know what you're doing, but I wanted more structure in mine. I decided on the Onya Baby because it has a long back, and my baby's already 15 months old and tall for his age. Plus I'm quite tall, and my husband's even taller. The Onya comes in an "outdoors" type fabric, making it more showerproof if you're out in the weather. And, the Onya has the in-built portable highchair alternative, which was a very attractive feature to me. Plus I liked the look of it, and there was more chance of my husband being happy to wear this model than any of the others I saw. (Onya has a very handy comparison chart here.)

Onya isn't available here, so I ordered directly from the company in the US. After some personal contact to sort out some bumps in my payment, it came through in good time; ready for our holidays!

Initial impressions:

Like I said above, we own a few other baby carrying devices, but no other soft structured carriers. So this isn't a comparison to any other carrier; it's my own impressions compared with, well, nothing.

The Onya is easy to put on, and easy to understand how to use. It comes with an instruction book, but you can easily figure it out from the videos on their website. I put it on and wriggled my son into it, and he was happy to be there (very different to his attitude to my faffing around with the shawl!).

The buckles are all strong and click well into position. The elastic safety loop on the waist belt is a pain to manoevre, and I wonder how well the elastic will last over time, but I don't have any suggestions for how it could be improved. It feels a bit odd to be tightening the shoulder straps upwards, when most backpacks I've ever used tighten downwards, but you get used to it quickly.

We tried out the carrier on me and my husband, and tried a few different ways of lifting in our son. We found that you have to make sure that he is really sitting deep in the back panel. If the panel is pulled too taut upwards, he sits lower in relation to the top of the carrier, he can't see out, and he doesn't like that. In general, he sits higher when I am wearing it, and is happier with that, than when my husband is wearing it. Maybe because my husband has a longer back and the panel is pulled higher and T sits lower in relation to looking over my husband's shoulder.

Our premier tour was to the local playground. T walked there and I wore the empty carrier. Then I lifted him in (easily, despite us both being novices) and we went up the hill to a friend's house on the way home. So far, so good!

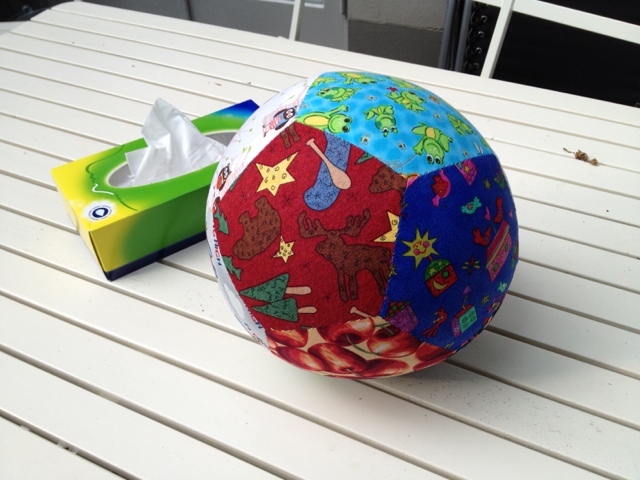
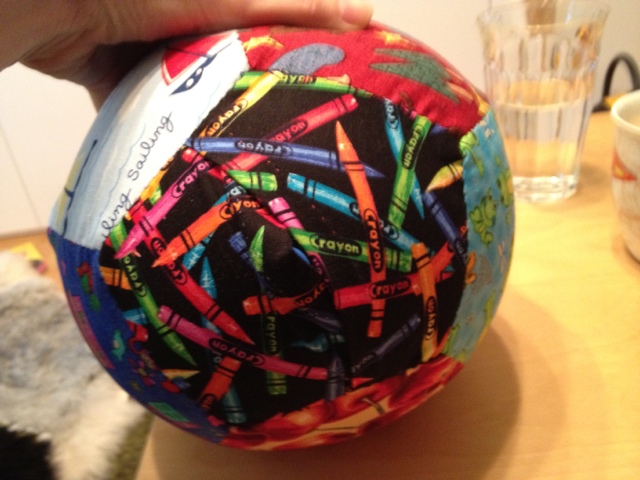
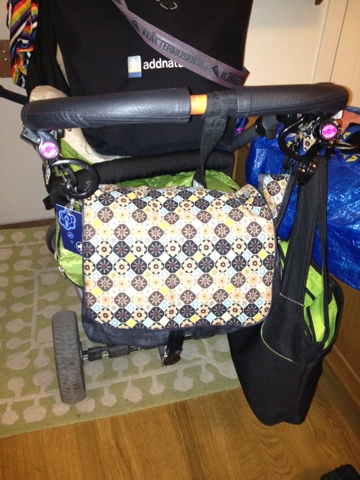
One thing I did early on was to sew a storage/travel bag for the carrier. A soft structured baby carrier is an awkward thing to transport or pack, with long trailing straps and buckles. It would be great if the carrier came with a matching, right size storage bag.

Off on holiday:

The big test was a holiday we had planned in northern Sweden. Sweden is very child friendly, but not every cafe and restaurant has highchairs. And we wanted to do some walking. We were flying there and hiring a car. With gear for four adults and one toddler, and one car to fit everything in, we decided to leave our rigid child back carrier at home and only take the Onya Baby.

It worked wonderfully! My husband and I alternated and we both wore the carrier at different times. Having this carrier with us, we were able to do things that just wouldn't have been safe without a carrier, and wouldn't have been possible with a child carrier. Things like riding in a ski chairlift for 20 minutes up the mountain. T was strapped into the Onya on my husband's front, and he rode there safe and secure all the way up. Once there, we put the Onya on a chair in the cafe for him to sit in. (They obviously do not get many highchair riding children in the Panorama restaurant that it takes a chairlift or a hike of several hours to reach...).

We went to the Ice Hotel and saw the 'ruins' of this year's hotel. We did a tour of the production and ice storage areas, T safe (and warm) in the Onya carrier.

We also went walking in Abisko National Park one day, following the first part of the "King's Trail" ("Kungsleden"). We were out for more than four hours. T rode in the carrier for a lot of that time. Where the trail was safe he walked for a bit. When we were near the river or any steep drop-off, he was safe on one of our backs. He could look around and reach for overhanging leaves. After lunch, when it all got a bit exhausting, he dropped off and had quite a reasonable nap in the Onya, with the hood up to support his head. It got quite warm that day, but he was fine and we could lift him down and let him stretch his legs and feel the breeze whenever he needed to.

Other thoughts about the carrier:

I love that the Onya Baby has pockets to tuck some small things into. I can carry my phone, purse and keys, a mini sunscreen and hand disinfectant, and still have room for one or two other things. It doesn't feel like these items are making the carrier uncomfortable, but you do need to think not to stuff the pocket too full. My son is, after all, still too small to tell me if my keys are stabbing him.

We have found that the straps twist through the buckles quite often. If you don't make sure that the strap is not twisted and then pull it through straight, it's easy to slide through a twist and then it's a bit fiddly to get it right again. Fiddly, but not a huge problem. Maybe it would be possible to fix this if the buckle holes were a little narrower.

We haven't tried using the hood in the rain, with my son awake. I suspect it won't stay on for long. But if we're going to be out in the rain, he'll have a raincoat and hood on anyway, and the carrier hood should work well for smaller children.


All in all, this was one internet shopping gamble that paid off for us. We are really happy with the Onya, and I anticipate that it will be getting lots of use, home and outdoors, in the coming months.

Here are some things you can do with an Onya Baby carrier:

You can look at the ruins of the Ice Hotel, go on a tour of their production
and storage areas, and see the indoor Ice Hotel and Ice Bar.
You can ride a chairlift up a mountain at midnight, to try and see the midnight sun through the clouds.
Safe and warm on pappa's chest, high over the mountain.
You can sit in the Abisko Njulla Panorama restaurant having a midnight snack,
and enjoying the fire while it tries to snow outside (at Midsummer!)
You can go hiking on the King's Trail.
You can look at the river, rushing with snow melt from the mountains.
You can jump down easily and walk some of the trail yourself.
And take a nap when it all gets a bit exhausting.
And you can visit wonderful places like this on Torneträsk (lake),
carried safely down the steep path, to a treasure beach full of stones!

Monday 11 June 2012

Balloon Ball from Pentagons

I finished my balloon ball from this post, and it's a big hit in our house with both big and little kids!


How to make this:

  1. Print 12 pentagons on normal printer paper and cut them out.
    1. You can make pentagons in Microsoft Word. It is under Insert --> Picture --> Autoshapes.
    2. Figure out how big you want your ball to be, and divide that measurement by 2.6. That will be the length of each side on your pentagons. Times this by 1.6 to find the width of your whole pentagon. (My pentagons were about 8.5cm along each side, 13.25cm wide, and my finished ball is about 22cm across.)
    3. Insert a pentagon and then make the pentagon as wide as the width you calculated above. Let Microsoft Word adjust the height proportionally.
  2. For eleven of the pentagons, place the paper on your fabric and cut roughly 1 - 1 1/2 cm outside the paper piece. (I used my roller cutter.)
  3. For each of these 11 pieces, place a paper pentagon against the wrong side of the fabric, and carefully fold the fabric seam allowance over the paper, making a sharp fold and keeping the fabric quite tight against the paper. Using a contrast colour thread, being careful to keep the paper centred in the fabric, hand baste (sew with big running stitches) about 5mm in from the edge, around all five sides. Now you should have eleven pentagons of fabric the same size as your paper pieces, with paper still inside.
  4. For the twelth pentagon, you need two pieces of fabric, each the full width of the pentagon plus seam allowances and about 2/3 the height of the pentagon plus seam allowances. In my case, with pentagons about 13.25cm wide, I needed two pieces each about 15.5 cm x 11cm. Take one long edge of each piece and turn about 1cm towards the wrong side, then fold over again; making a hem roughly 1cm wide. Sew along the hem. I hand sewed this with small running stitch, but you could just as easily machine sew it.
  5. Lay your two hemmed pieces of fabric right sides down next to each other, hem-to-hem, then overlap the two hemmed edges by about 3 cm, maybe a little less. Sew two seams at right-angles to the hemmed edges, joining the two overlapping pieces, from hem to hem, about 4-5 cm apart.
  6. Set your last paper pentagon over the two overlapping fabrics and pin, then baste as you did with the other eleven, folding the seam allowance around the paper.
  7. You should now have twelve fabric pentagons with paper sewn in.
  8. Load up a needle and thread with a matching thread. I used a variegated thread with my multi-coloured fabric, but anything that's not going to clash too badly is fine. It's better to match your thread to darker colours rather than lighter, if you want it to blend as much as possible. I used doubled thread; if this ball breaks it will because the fabric gives out, not because my sewing does!
  9. Take two pentagons and place right sides together. Then sew a ladder stitch seam to join the two pentagons along one edge. (For a quick run through on some options for different stitches and some pictures showing what the stitches look like, see the Sometimes Crafter here.) I tied off my sewing at every corner. This is possibly not necessary, but I wanted it to be easy to mend, if any sewing did start to come undone.
  10. Continue joining your pentagons in this pattern:


    (image from Wikipedia)

    It should look something like this:

  11. Join all the edges together. You do not need to leave any gaps for turning. When you've finished, it should look something like this:
  12. Carefully draw out all your basting threads and remove the paper pieces.
  13. Turn it inside out, through the gap between your overlapping piece.
  14. (This is where I though I was finished, but I realised that the overlapped pentagon was too wide, and the opening too big. So I sewed the seams described in paragraph 5 above now.)
  15. And here you have the finished product!
  16. Insert a balloon through the opening (with the mouth piece still outside) and inflate. You can just twist the balloon and tuck the end into the fabric ball. This makes it easy to deflate again and reuse the balloon, but it won't stay up for long. Otherwise tie off the balloon properly and tuck the end away inside.
Voila! One lightweight, kid friendly, furniture friendly, ball!
    Note: while they are lightweight, these balloon balls still fly pretty well. Don't smash at people, expecting them to slowly float across the room like a normal balloon! Not that I speak from experience or anything...

    Now that's it done, I do have a few "if I knew then what I know now" points.

    • Firstly, the overlap is too big on this size pentagons, as I've said above. I only figured this out after the fact, so I've included instructions to make it a bit smaller before sewing up your overlapping pentagon. I didn't fix that until after I was otherwise finished.
    • This ball is quite big. I think my little man will appreciate one slightly smaller, so I'm planning on making him a smaller one, and any extras I ever make for gifts will be a bit smaller.
    • For my toddler, it's quite hard to grab this ball. So my next model for him will include some grab loops along a couple of the seams.
    • It seems this is a popular toy indoors and outdoors. So his next version will not be made from quilting cotton fabrics, but rather some upholstery fabric samples I have lying around. This will be an outside version.

    Monday 4 June 2012

    Balloon balls

    I've seen fabric covers for balloons on a few different websites now, and I thought this would be a fun thing to make for my son, and more to have in our present box for other small people.

    Some of the blogs I looked at which have free patterns for balloon cover include:


    [Update January 2013: i have since made balls to each of these patterns. See my post about it here.]

    Then I googled "how many hexagons to make a sphere", learnt that you can't make a sphere-like form with only hexagons, and ended up browsing polyhedra on wikipedia; in particular the images labelled "net". They lay out all the individual pieces as you would need to make a full solid form. (Look up polyhedron and dodecahedron on Wikipedia, you can see some funky shapes!)


    I decided to give pentagons a go, making a "dodecahedron". That's 12 pentagons sewed together, with 30 edges. If I've understood the mathematical formulas on Wikipedia correctly, the approximate radius of your sphere will be 1.3 times the length on the side of your pentagon.If you figure out how wide you want the ball to end up (maybe you want to put 25cm balloons inside, like me, or make one about 18cm for 20cm ballooons), take that diameter and divide it by 2.6. So for a sphere approximately 22cm wide, I should need pentagons with sides roughly 8.5 cm, plus seam allowance. I did a Google image search for Pentagon and found this.


    And more Wikipedia research tells me that I need the diagonals, (aka the width of the image) to be about 13.75 cm. If you want to do this with different figures, you can take the length of your pentagon sides and multiply by 1.6.


    I've inserted my pentagon image into a Word document, adjusted it so each pentagon (the largest, outside one) is 13.75 cm wide, and copied it 12 times. Printed out, they are about 13.75 cm across, with sides of about 8.5 cm. Now to cut them out, use them as paper patterns, cut out fabric including seam allowance outside that, and sew them all together.


    An observance at this point, they seem HUGE! Wonder if my maths is wrong, or my perception.


    Anyway, now I have (another) nice little TV project for a few evenings. Or many evenings. I'll let you know how it goes...


    Tuesday 22 May 2012

    I spy charms: ready to post

    This is it! All our swap charms are in, and they are ready to be posted. We haven't shared pictures so the participants will get a surprise when they open their mail. I might share some of my favourites once the packages have arrived.

    Thursday 10 May 2012

    Toddler hanging board

    Whilst on his mission to empty every drawer in our house, my 14 month old son found a keyring. Since then, this has been a favourite treasure, carried from room to room as he experiments with where he can find to hang it. We have venetian blinds inside our double-glazed french windows and the little knobs for winding the blind cords on are at a perfect height for him (the blind cords are now all kept well out of his reach). The cupboard knobs on our bathroom vanity are a good spot, and the drawer handles on the chest of drawers in the hall. Slightly less predictable are the controls on the washing machine, but the keyring hangs there quite nicely, if he gets the balance right.

    Yesterday he and I made a hanging board with lots of hooks and catches, for him to experiment and play with. It's all made from things we had lying around.


    Here's directions for making a similar one:

    1. Find one length of wood, and a bunch of miscellaneous hooks and knobs.

    2. Recapture those hooks and knobs that your child has claimed and carried away.

    3. Place the hooks approximately where you want to have them on the board. Mark with pencil the centre of the board at each point where you have placed a hook.


    4. Get out your drill bits and check which size you need for each of your hooks or knobs or screws. The drill bit should be about the same size as the centre of the screw on your hook, so if you hold them up with the drill bit in front, you can see the flanges of the screw sticking out on either side. Get your pencil back from your toddler and write down the size you need for each hole, in order, on a piece of paper.


    5. Decide how you're going to attach/hang/fasten your board. See below for more info. If necessary, mark the back of your board where you need to drill.

    6. Head outside with your drill, drill bits and hooks. Drill each spot you've marked with the size drill bit you wrote on your paper. Be careful not to go all the way through (it doesn't matter to the project, but you might damage your drill or whatever you're resting the wood on).

    7. If you're using strapping to hold up your board, this would be a good time to staple the strapping on the back.

    8. Screw in your hooks. I needed to use pliers to get mine all the way in. Rescue your plants from the toddler who may be trying to dig them up with a screwdriver.

    9. Fix your fasteners to the back, and any protective wadding you need (see below).

    10. Let your child loose with their new hanging board! Have your camera handy for the smiles. :)


    How to attach/hang/fasten your board

    I started with a big hook on the back of our board, to hang over the top of our low cupboards. But this caused several problems. There is an overhang on our cupboard benchtop that the hook didn't fit under. And there was no way to hold in the bottom, so my son was banging the board (and the sharp edged hook) on the cupboards as he tried to get the keyring off the hooks. So I took the hook off and staple-gunned a strap with an adjuster to the top and bottom of the board. Then I glued felt over the staples. This fits around a cupboard door that is closed with a child lock, so he can't pull the cupboard door open and the door is protected from scratches.

    If hanging with a hook:

    1. Mark on the back of your board where your hook should be attached and check that it is not too close to any of the screws coming in from the front of the board. If necessary, move hooks on the front up or down.

    2. When drilling for the front, also drill the back holes.

    3. Screw your hook to the back.

    4. Hang your board!

    If using strapping:

    1. Find strapping or webbing long enough to go around the cupboard or place where you want to use your board. Fit an adjuster so you can pull the strap tight.


    2. Using a staple-gun, attach the webbing to the top and bottom of your board.

    3. Glue felt over your staples (I used a hot glue gun.)


    4. Strap your board where you want to use it!


    If anyone else makes their toddler a hanging board and comes up with another way to hold it up, I'd love to hear about it in the comments!

    Friday 27 April 2012

    Taggy turtle

    [Spoiler warning: If you're in my I-spy swap and don't want to see any of the fabrics before your package arrives in the mail, look away now! This project uses the scrappy bits left over after I cut my charms.]


    Yesterday I was cleaning the house, washing, shopping, tidying browsing Pinterest and surfing through the blogs it led me to, when I found this cute little pattern from Make It Love It (a great blog with lots of free patterns and lovely ideas).

    I was planning on sewing a taggy snuggle blanket for a friend's baby, so it became a taggy turtle instead!


    As normal, I'm incapable of following a pattern without adapting it somehow. I shrunk this a little from the original, cut the shell pieces in half (because the scraps I was using were only that big, and it worked well for adding my tags), switched out the feet for ribbon tags and added small ribbon tags along the seams.


    I think he's gorgeous, and I hope his new owners will too.

    Monday 23 April 2012

    Packages in the mail

    Today the postman brought me three packages! I like getting packages. These had I-spy charms in them.

    Now I have 10 of the 16 batches for this swap. There's still a few weeks until the charms are due, so I might have to be patient for the others. Something I'm never very good at.

    We've decided not to post pictures of our fabrics, so we each get a surprise when our packages come in the mail. So I'm not going to show what I've received until the other swappers have received their charms.

    Sunday 22 April 2012

    Pinafore or crossover apron

    I saw this image on Pinterest. Can anyone help me with either a) where this image comes from, or b) where I can find a pattern for a similar adult crossover back apron?

    Hmmm. Answered part of my own question: the image is from here: Pip-Squeak Chapeau etc. And a possible pattern here: Simplicity Pattern 5201 or here: Scalloped Apron Pattern from Candle on the Hill.

    But with everything out here on the net, still think there must be a free pattern on a blog somewhere! I love this: Smashed Peas and Carrots' Little Girl's Crossover Pinafore, but I don't think that's going to fit me!

    Wednesday 18 April 2012

    Some stash fillers and their present/project bag

    Yesterday I went to a birthday party for a friend and as I know she's a knitter, I gave her two balls of yarn and some needles. Everyone can use more fancy yarn in their stash!


    The yarn was one ball of "Plassard Pastorale" in colour 09 and one ball of "Plassard Oh La La" in colour 112. Both are dark reds, purples, browns and pinks, and the Pastorale has some yellow and green through it. (It seems that the Pastorale is an old line that is no longer available. Guess they were selling off the last of their stock at my local yarn shop -LYS).

    Oh La La is a type of netting yarn. It knits up into really funky ruffles eg:here.

    The needles are Clover bamboo, 5.5mm and 23cm long. I love working with these short needles if my project fits, because they take so much less elbow room! And the Clover bamboo needles are lovely on my hands.

    Then I had to find something to present this in. Now I love a fancy parcel but I have a fundamental objection to wrapping paper. I do admit to resorting to it when I don't have the time, the money or even the personal motivation to fix anything else, but in principle I think the concept of gift wrapping paper is seriously unenvironmentally friendly. Most wrapping paper looks like it is not made from recycled materials and will be hard to recycle, it rarely seems to end up in the recycling bin, and it serves no useful purpose. It is use of materials purely for a fleeting, cosmetic purpose. So wasteful.

    Consequently, I often try to sew fabric bags or wraps that can be regifted or repurposed. I know friends and family have stashes of my bags now (that they always seem to strategically use for their own closest family members, so they rarely make it back to me so I can reuse them! Hmph.) Apparently I've also inspired others to sew bags; my sister in law's mother now has a supply of christmas bags too!

    Back to yesterday's parcel: I decided that I wanted to sew a little present bag, that could also be used as a project bag for a work-in-progress or WIP. Looking through my fabric stash, I couldn't find any lightweight fabric that I felt suited this friend. But then I remembered that I have a box full of samples from a store where I worked that sold upholstery fabric. When the range changed, I was allowed to take the old pages from the sample book. Perfect! And so I made this:


    How did i do it?

    I picked out some dark orange squares, and found an embroidered band that I bought years ago in a market in Ecuador. I've not yet found anything to use these bands on, and I have a few in my stash.

    I cut the paper off the edge of the sample rectangles, and rounded the two bottom corners. I folded down the top edges, and used my machine's hemming stitch to sew them down as discretely as possible. I straight stitched the band to the rectangles, right sides together, and overlapped the ends of the band at one side. I zigzagged the fabric edge to stop it fraying.

    Then, because it gaped open and I wanted it a little more closed as I handed it over, I sewed a ribbon loop to one top edge, and sewed the middle of a piece ribbon to the other. One end of the ribbon goes through the loop, and tie it in a bow. Da da!


    Simple but I think it was very effective. :)

    Thursday 29 March 2012

    International I-Spy charm swap


    I've seen a few swaps organised online for fabric squares to make an I-Spy quilt. I really want to make my son an I-Spy quilt, and I really don't want to buy the minimum cut of all the different fabrics I'll need! I haven't managed to find any swaps that are a) open now, or b) open to non-US residents, so I thought I'd organise my own.

    UPDATE: Our swap is now full. I can't wait to see what everyone sends in!

    If you are interested in doing an I-spy swap, post your email address in the comments field, or send me a private email. If we get enough people interested, I will organise another swap.

    What's an I-Spy quilt?
    An I-Spy quilt is a patchwork with many different fabrics showing many different objects. Kids can be given a list or small cards naming everything on the quilt. They then search the quilt to find the different items. They are great for keeping kids entertained: outdoors, in the car, or anywhere really.

    What's this?
    So here it is: an international swap for I-Spy charm squares (12,5 cm or 5 inch squares), open for sign up as of 1 April 2012. Fabric to be posted to arrive in Sweden no later than 15 May 2012. I'll get them all back in the post by 31 May. When you get it will depend on where you are.

    Fabric
    This swap is for I-Spy fabrics, that means small images of things that a child can name. Things like cats, strawberies, playing cards, ladybirds, dinosaurs, soccer balls, drums, frogs, pirates, dragonflies, boats, suitcases, fairies, zebras, buses, etc etc.

    The images also need to be small enough that every square you send has the item in an identifiable form. It's no good sending a fabric that has a big image, so one square has the head, and the other squares all have abstract looking back legs. So please send small prints that look good on a charm square.

    No solids, dots, or abstract patterns. Floral prints are no good, specific flowers are ok - such as "daisies" or "tulips" (but not too many so avoid if you can).

    Please: no licensed images (sports teams, Disney characters, etc).

    The fabrics should be good quality cotton patchwork fabric, new, unwashed, from a smoke-free home.

    Format and number
    Each fabric square you send in should be 12,5 cm (5 inches) square. Please be very careful when cutting to ensure that your pieces are this size. There are good instructions for cutting charm squares on Elizabeth Hartman's blog post here. You will need 16 charm squares from each of 5 fabrics. If you're really careful, you should be able to get that from 25 cm full width, or from a fat quarter. If in doubt, buy extra to be on the safe side!

    So you send me 80 squares and you will get back 80 squares; 5 of which you sent, the other 75 new! (I know you ought to be able to keep your own fabrics, but then I have to keep track of who sent what, so it'll be way easier for me if you send me all 16 pieces, and you'll get back squares of the fabric you sent in as well.)
    If you can group your fabric, that would be appreciated. Place one of each of your five fabrics in a small pile together, before bundling them all up to post to me.

    Packaging and payment
    Put all your charm squares into a small plastic bag (eg ziploc), together with a card showing your name, email address and postal address. Please type all names and addresses, no hand written cards! Post it to the address I will email to you with acceptance of your sign-up to the swap.

    Then pay for your return postage into my Paypal account. Details will also be in your acceptance email.
    UPDATE:Postage to addresses in Sweden will cost 50 SEK. Anywhere else in the world: 90 SEK (roughly 10.5 EUR or 13.5 USD.) This includes a padded envelope that I will buy. If you take more than one slot, you can get up to three sets of 80 charms into the same envelope, same postage cost.

    Sign-up
    This swap is now full, and it is not possible to sign up. If you are interested in doing an I-spy swap, post your email address in the comments field, or send me a private email. If we get enough people interested, I will organise another swap.

    New baby change bag

    A few weeks ago I finished our new change bag. I think it is way nicer than anything I've seen available to buy.


    I followed a pattern by Åsa Sandblad (in Swedish) that I bought at Tyger och Ting, where I also got the fabric; but of course since I'm incapable of just following a pattern, I adjusted it a bit.

    My version is one and a half times as wide as the original, and has only three fabrics, instead of the suggested four.

    The pattern doesn't specify how to make the internal pockets; I put in one zip pocket across the whole width on the back lining. I thought about (tried) a patch pocket inside the flap, but since I'm not capable of making a good looking patch pocket with no open edges inside, I gave up that idea.


    I put a loop inside one side seam of the lining that I can hook my keys on, and a clip buckle to hold down the flap (as it's always overfull).


    I also put in loops on the top seam outside the shoulder strap, and made extra straps to hold it to the pram handles.


    When I was done I whipped up a couple of pouches for inside, with the fabric I had left over.


    They've each got two zip pockets; I use one for nappy change things and the other has a change of clothes, some emergency toys and the pegs I use to hold blankets over the pram.


    Overall I'm really happy with this new bag. It is a bit small to fit in everything I need to take with me. I can squeeze in a bit of food, but for a long day needing several meals and snacks, I need a separate bag for my LO's food.


    And it's not remotely waterproof, which is really tempting fate. I wonder if there is any spray I can use to make it slightly more water repellent?

    If I were to start again, knowing then what I know now, I would probably make it a smidgeon bigger, in all directions. I would definitely make the side pocket bigger, as that's too narrow for any sort of bottle, and not very useful as it is now. I would put the clip buckle in as I was making the flap/outer, instead of sewing it on after the fact, and I would put much more reinforcing in the loops that it hangs from on the pram. So far they're holding, but they are pretty thin and might not last as long as I hope they will.

    So there you have it. Our one-of-a-kind change bag.


    P.S. There's a picture of the original design on this blog post.

    Wednesday 7 March 2012

    More detail about my aeroplane activity centre

    This blog post refers to my previous post: Aeroplane activity centre

    I'm not going to make a full tutorial on how I made my aeroplane activity centre, but I thought I'd share some of my methods.

    Basically, to make one of these, you need to:
    1. Sew all activities to front piece.
    2. Sew side tightener and velcro for top straps to back piece.
    3. Sew front and back piece at side seams, catching in eyelets. Sew front to back along bottom seam, catching in all texture ribbons, elastic, carabiner hook and eye, pocket and ties for pocket contents.
    4. Sew velcro for fastener to one inside piece. Sew front and back inside pieces along side seams, catching in handle and fastener flap. Sew sides of the bottom seam, leaving a 15-20cm gap.
    5. With the main section right side out, and the inside section wrong side out, place the main section inside the inside section. Sew main front and back to inside front and back all around the top seam, catching in the top straps.
    6. Turn right way out. Sew a top stitch seam along the bottom of the inside, closing the opening you left before. Push the inside down inside the main section. Top stitch along the seam between the main section and the inside.
    Ta da! Simple right. Especially step one. But in case you need more detail than that...

    The whole thing is supposed to be a finished size of 45cm x 25cm. I tried to use 1.5cm seam allowances. The back piece is actually 49cm wide and the front 41cm, to make sure that the eyelets in the side seams are accessible.

    I made my activity centre in a lightweight denim. The one I found is actually a little stretchy, which worked fine. I made one HUGE mistake. I didn't prewash my fabric and set the dye. So my hands were blue the whole time I was working on it, and I hate to think what my LO will look like when he's had a chew on it. :( If you're making one of these, wash your fabric and make sure the colour won't run!!

    The front piece is backed by some heavy weight interfacing. The one I used is called "Vildona".

    The buttons on the left are sewn on using upholstery thread, and are tied off in the middle, so there are two separate threads that have to break before a button will come off.

    The buttons on a string are on beading wire, that is plastic coated metal. At each end, the wire is wound several times in a tight circle, and I machine sewed zigzag over four sides of the circle. The buttons covering the ends are sewn on the same as the "winding" buttons, upholstery thread tied off in the middle.

    The shapes on the velcro are stuffed with a couple of layers of polarfleece. I sewed the velcro loops on by machine, then I hand sewed each shape around the fleece, which was cut to the same shape. In hindsight, I would not use satin ribbon to attach these, as the velcro is catching on the ribbon and pulling out threads, which doesn't look nice.

    The frog is cut from a patterned fabric, with a plain backing. I cut a hole in the backing fabric, threaded in some elastic, and zigzagged over the opening to close the open edges and to attach the elastic. Then I hand sewed the frog to the backing (wrong sides together), turned right side out, and sewed the last opening closed. I quilted a little around the frog's head to hold front to back. The lily pad is hand sewed on. There is a button hole in the denim just above the lily pad, through which I threaded the elastic. The elastic is then drawn up behind the denim, and sewn about a centimetre from the top seam. You could probably just pin it, then sew it into the top seam if you wanted.

    The magnet square was the hardest. I tried several other methods and binned them before I settled on this one. I wanted to hold the magnet in the middle of the circle-on-a-string without using any glue or suchlike, as my baby still puts everything in his mouth. And sewing the magnet in through all the layers just looked very bumpy and messy when I tried it. There are probably many other, better ways to do this, but this is how I did it:

    (Extra note: It was challenging to sew the items I did after the magnet square, because the magnets held the work to the sewing machine table. So I suggest marking where your magnet square will go, then doing everything else, then sewing the magnet square on last).
    1. Cut 20 circles of interfacing the size of the circles you want. Mine interfacing was "Vilene 250", and my circles are about 4cm in diametre.
    2. Iron three circles to each colour fabric you want, leaving space between them for about 1cm seam allowance on each circle (ie 2cm space between each interfacing circle). Cut out three circles of each colour with seam allowance.
    3. Take two other interfacing circles and put a small flat (quite strong) magnet in the middle. Hand sew around the magnet to hold it in the middle of the circle.
    4. Take two of your coloured circles (I used two different colours- you can use just one if you want) and place a magnet in interfacing between them.
      1. If using different back and front colours, make sure you have colours 1-2, 2-3, 3-4, and 4-1.
      2. When placing in your magnets, make sure you have the poles facing the right way. You need the two colours of 1 and 3 to have one pole of the magnet, the two colours of 2 and 4 to have the other pole. Set up a "control magnet" that must not turn over, and make sure colours 1 and 3 stick to it, 2 and 4 are repelled by it. (If you have the same colour on both sides of your circles on a string, this is not important).
    5. Hand sew together, right sides out, folding in the seam allowance as you go. Use the interfacing you ironed to the fabric as your sewing guide. So the seam you are sewing has: front right side of coloured circle with interfacing ironed to it, 1 extra layer of interfacing sewn around magnet, folded in seam allowance for front coloured circle, folded in seam allowance for back coloured circle, second layer of interfacing sewn around magnet, and back coloured fabric with ironed on interfacing.
    6. Sew in string before you finish the circle.
    7. Do the same for three other circles.
    8. Cut a piece of white fabric for the main square that is the size of the square you want plus seam allowance - ie 10cm + 1.5 + 1.5.
    9. Cut a piece of fabric the same as the main activity centre (mine was denim) the size of the square you want. Mine was 10 x 10 cm.
    10. Cut two squares of double sided interfacing the size of your square (10x10 cm).
    11. Iron the interfacing to the white and denim squares, leaving on the backing paper on the denim, not the white.
    12. Figure out where the centre of your coloured circles will be, and lightly glue one magnet to each of the four points on the front of the denim square. If using two colours on each circle on a string, make sure that you have opposite poles on the magnets upwards. So as you go round the square, you have N-S-N-S. Check with one magnet that you hold the same way up the whole time. It should be attracted to two magnets at opposite corners, and repelled by the other two.
    13. Place the white square over the denim square and sew around each magnet.
    14. Tack in the seam allowance on the one circle you have left of each colour, so you have one circle of each colour in the right size. Iron to help hold the seam allowance in.
    15. Place one circle of each colour onto the white background square over the magnets. Use the circles-on-a-string that you have already sewn, and make sure that you sew the right colour over the right magnet. When colour 1 is placed over a magnet on the white square, you should be able to stick either of the circles-on-string with colour 1 upwards over that magnet. If it is repelled, put colour 2 on that magnet instead, and colour 1 next to it. You should have the colours 1-2-3-4 in order around the square, and each circle on a string should attach to two circles next to each other, on one way up and one the other way up. You're not sticking colour 1 face to face with colour 1, but colour 1 should be upwards and sticking over the circle that is colour 1 on the square. Remove your circles-on-a-string and sew the coloured circles to the white square. I tried not to catch in too much of the denim, but it doesn't really matter.
    16. If you haven't already done so, remove tacking from the circles, that was holding in the seam allowance.
    17. Take the backing paper off the interfacing on the back of the denim, and carefully iron the seam allowance of the white square around the denim, so that it is held down to the back of the denim. Fold in the corners that won't be stuck down, and iron them in place so they don't show at the front. This ironing also sticks together the white layer to the denim, where there are no magnets. Be careful not to get interfacing glue on your iron, nor to stick the whole thing to your iron with the magnets.
    18. Decide which way up you want your square on your activity centre. See which two colours are on each side, and pin the string for the circle-on-a-string with those two colours there. If the square has colours 3 and 4 on the upper edge, pin the circle with colours 3 and 4 where the centre of the top of the white square will be. Each string should be long enough that the circle is just too short to reach the magnets on the opposite side of the square. Take the square off, and sew the strings to the main activity centre fabric, making sure each is well attached.
    19. Place the square back on the activity centre front piece and zigzag all around the edge.
    Phew!

    The press stud butterfly and his flower and cloud are made from felt, attached with double sided interfacing and zigzag stitch. The butterfly is two layers of felt with Vildona and double sided interfacing in between, with embroidery thread for decoration and plaited into the string to hold him on. The press studs are sewn with upholstery thread and knotted between each corner, so if a thread breaks they still shouldn't come off.

    I think everything else is pretty self explanatory.

    Good luck!

    Aeroplane activity centre

    I'm travelling in a week or so with my son, who will just have turned one. Inspired by something I saw on Pinterest and followed back to a blog post by Jeanine at Serving Pink Lemonade, I decided to make him an aeroplane activity centre, to fit over the plane's tray table. More Pinterest browsing on "quiet books" and "busy books" gave me loads of inspiration for activities I could use.

    After many evenings of cutting, ironing, sewing, unpicking, resewing... It is finally finished!

    I'm really pleased with how it turned out.

    The activity centre folds into a little package with a handle.


    You undo the velcro fastener, open it up, and turn the whole thing inside out to reveal the toys.


    It should (hopefully!!!) fit over the tray on the plane seat. I made it a little wider than the measurements I found online, and fitted velcro straps that can be tightened on the back. The top straps should go over the back of the tray, and can fold over any excess if it's too tall.


    The side strap goes through the buckle and back, where it can be pulled in to hold the activity centre tight.


    The front is where everything is happening. ( I didn't put anything on the back, because I'm fairly sure I'll have to take it off to fold up the tray, it's way too thick to leave on and be able to "fasten the tray table in an upright position".)

    On the left, there's a row of buttons with a ribbon to wind around them.

    Next is a square of velcro fuzz, with four shapes to stick to it, a triangle, square, hexagon and star.

    Under the velcro square is a string of buttons to slide back and forth.

    In the middle is a frog on a lily pad.


    The frog is on elastic, if you pull him and let go, he jumps back into place.


    To the right is a square with four coloured circles each containing a magnet. There are four circles on strings that also have magnets, to match to the right colour. The circles on strings have a different colour on each side, and they can each reach two of the base circles.


    If you try to put it on the wrong one, you have the wrong pole of the magnet, and it won't sit in place. You need to put it on the other circle, or turn it over.


    Under the magnets is a plastic buckle.


    On the far right is a butterfly on a press stud, that can snap onto a leaf, a flower or a cloud.


    At the bottom of the tray is a zip. Sewn into the front seam are some cords of different texture, some rings on elastic, a carabiner and a loop to catch it on, and a pocket.


    Inside the pocket are a stuffed heart and a stuffed sun. The heart is on elastic and the sun on a ribbon.

    Along the side seams are small loops, so I can attach other toys on strings and carabiner hooks, if I want to.

    I'm also hoping this will fit onto the pram bumper, with the top straps, so he can use it there as well.

    That's it! I know a lot of this will be far beyond my LO yet, but I have no plans to make a new one of these any time soon!


    If you'd like more information about how I made this, take a look at my next blog post: More detail about my aeroplane activity centre.